How to Create a Vpn Connection on Windows 10
A VPN or a Virtual Private Network is used to access a particular network from another network. In other words, it can also be called as a mini-Internet. It can be used in two ways. Either it can allow you to get access to a closed server, which means you would not be getting access to the Internet; or else you can use it to access a set of resources and at the same time get access to the Internet. You get the point!
But what if you want to access your resources at home while you are away? What if you want to use the private server at your office or home while you are away? This brings in the callout for a VPN server for yourself.
Today, we are going to learn to do the same.
How to create a public VPN Server on Windows 10
In this process, we will be undertaking the following steps
- Find your IP Address.
- Set up port forwarding on your router.
- Set up a VPN Server on Windows 10.
- Allow VPN connections through the firewall.
- Set up a VPN connection on Windows 10.
Find your IP Address
This is fairly simple. You can learn more about finding your IP Address.
Set up port forwarding on your router
Just so that you should be able to connect to the VPN Server through a public network like the Internet, you will need to configure port forwarding.
For that, start by logging in to the Admin Panel of your router. You need to do that because your router will be the gateway for you to access that network.
Once you are logged in, look out for a menu tab labeled as Port Forwarding, Applications and Gaming, NAT/QOS or any other similar name.
For connections based on Point to Point Tunneling Protocol, set the port number to be 1723.
Save the configuration and then Reboot your router.
Set up a VPN Server on Windows 10
Start by typing in ncpa.cpl in the Cortana search box and click on the appropriate entry that comes under the category of a Control Panel item.
Hit the ALT + F key combination on your keyboard to bring down the File Menu. Select New Incoming Connection.
Now a mini window will come up where can allow the user accounts on the particular machine to access the VPN connection.
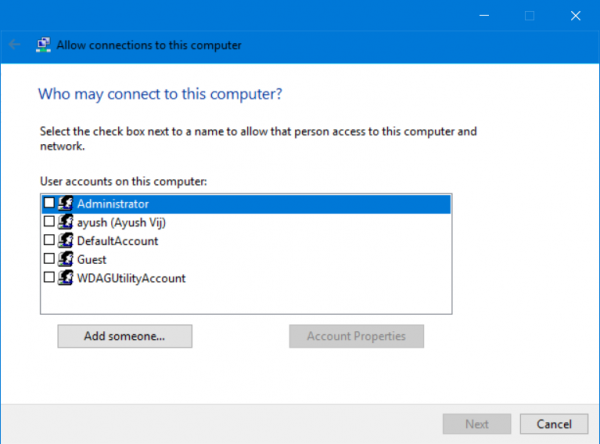
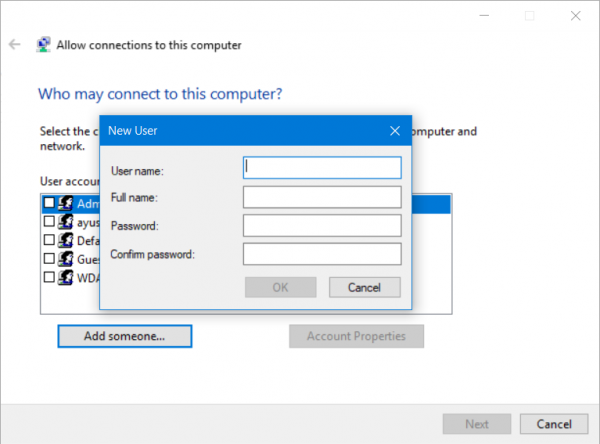
Alternatively, you can select Add someone in order to add someone else in the whitelist for accessing that connection.
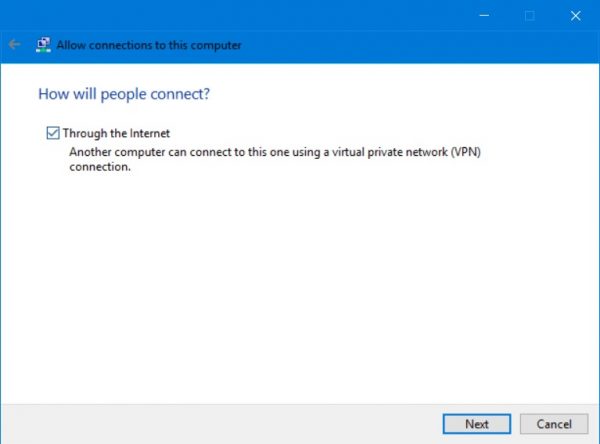
Click on Next and you will see an option to select how people will connect to the network. Check on Through the Internet.
After clicking on Next, you will find a page where you need to configure the network.
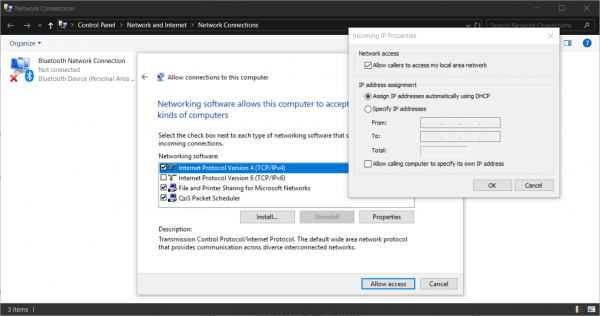
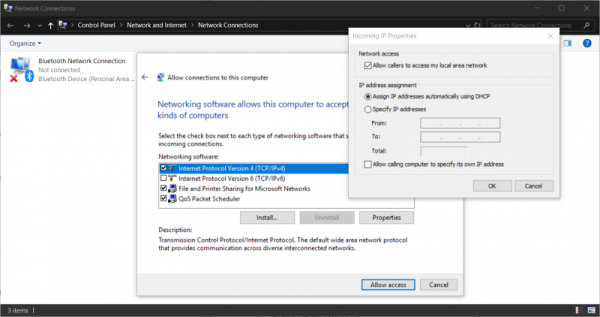
Select IPV4 and click on Properties.
Now you will be asked to configure some additional settings like letting the users access your Local Area Network or how IP Addresses are allocated to these users.
Click on OK to save your settings.
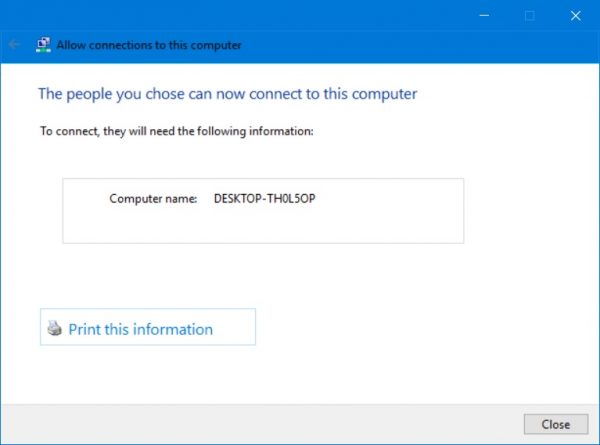
Once you are done configuring the network, click on Allow Access.
If you want, you can now print this information for your further reference or for the client machine.
Click on Close to exit the configuration process.
Allow VPN Connections through the firewall
Open the Cortana search box and search for Allow an app through Windows Firewall.
Click on the appropriate result to open the intended Windows Firewall Settings page. Click on Change Settings.
Scroll down to check if Routing and Remote Access is Enabled for both Public and Private networks. Click on OK.
Set up a VPN Connection on Windows 10
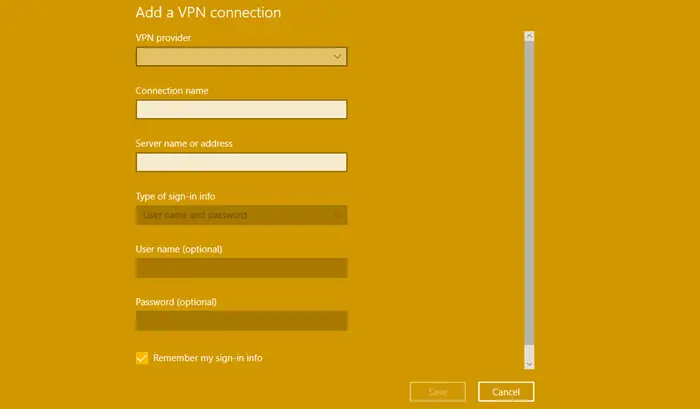
To set up a PPTP Connection on Windows 10, you can read our similar article here on setting up a VPN on Windows 10.
Hope you can get it working!
Ayush has been a Windows enthusiast since the day he got his first PC with Windows 98SE. He is an active Windows Insider since Day 1 and is now a Windows Insider MVP. He has been testing pre-release services on his Windows 10 PC, Lumia, and Android devices.
How to Create a Vpn Connection on Windows 10
Source: https://www.thewindowsclub.com/create-a-vpn-server
0 Response to "How to Create a Vpn Connection on Windows 10"
Post a Comment