How to Make a Window Look Like Stained Glass
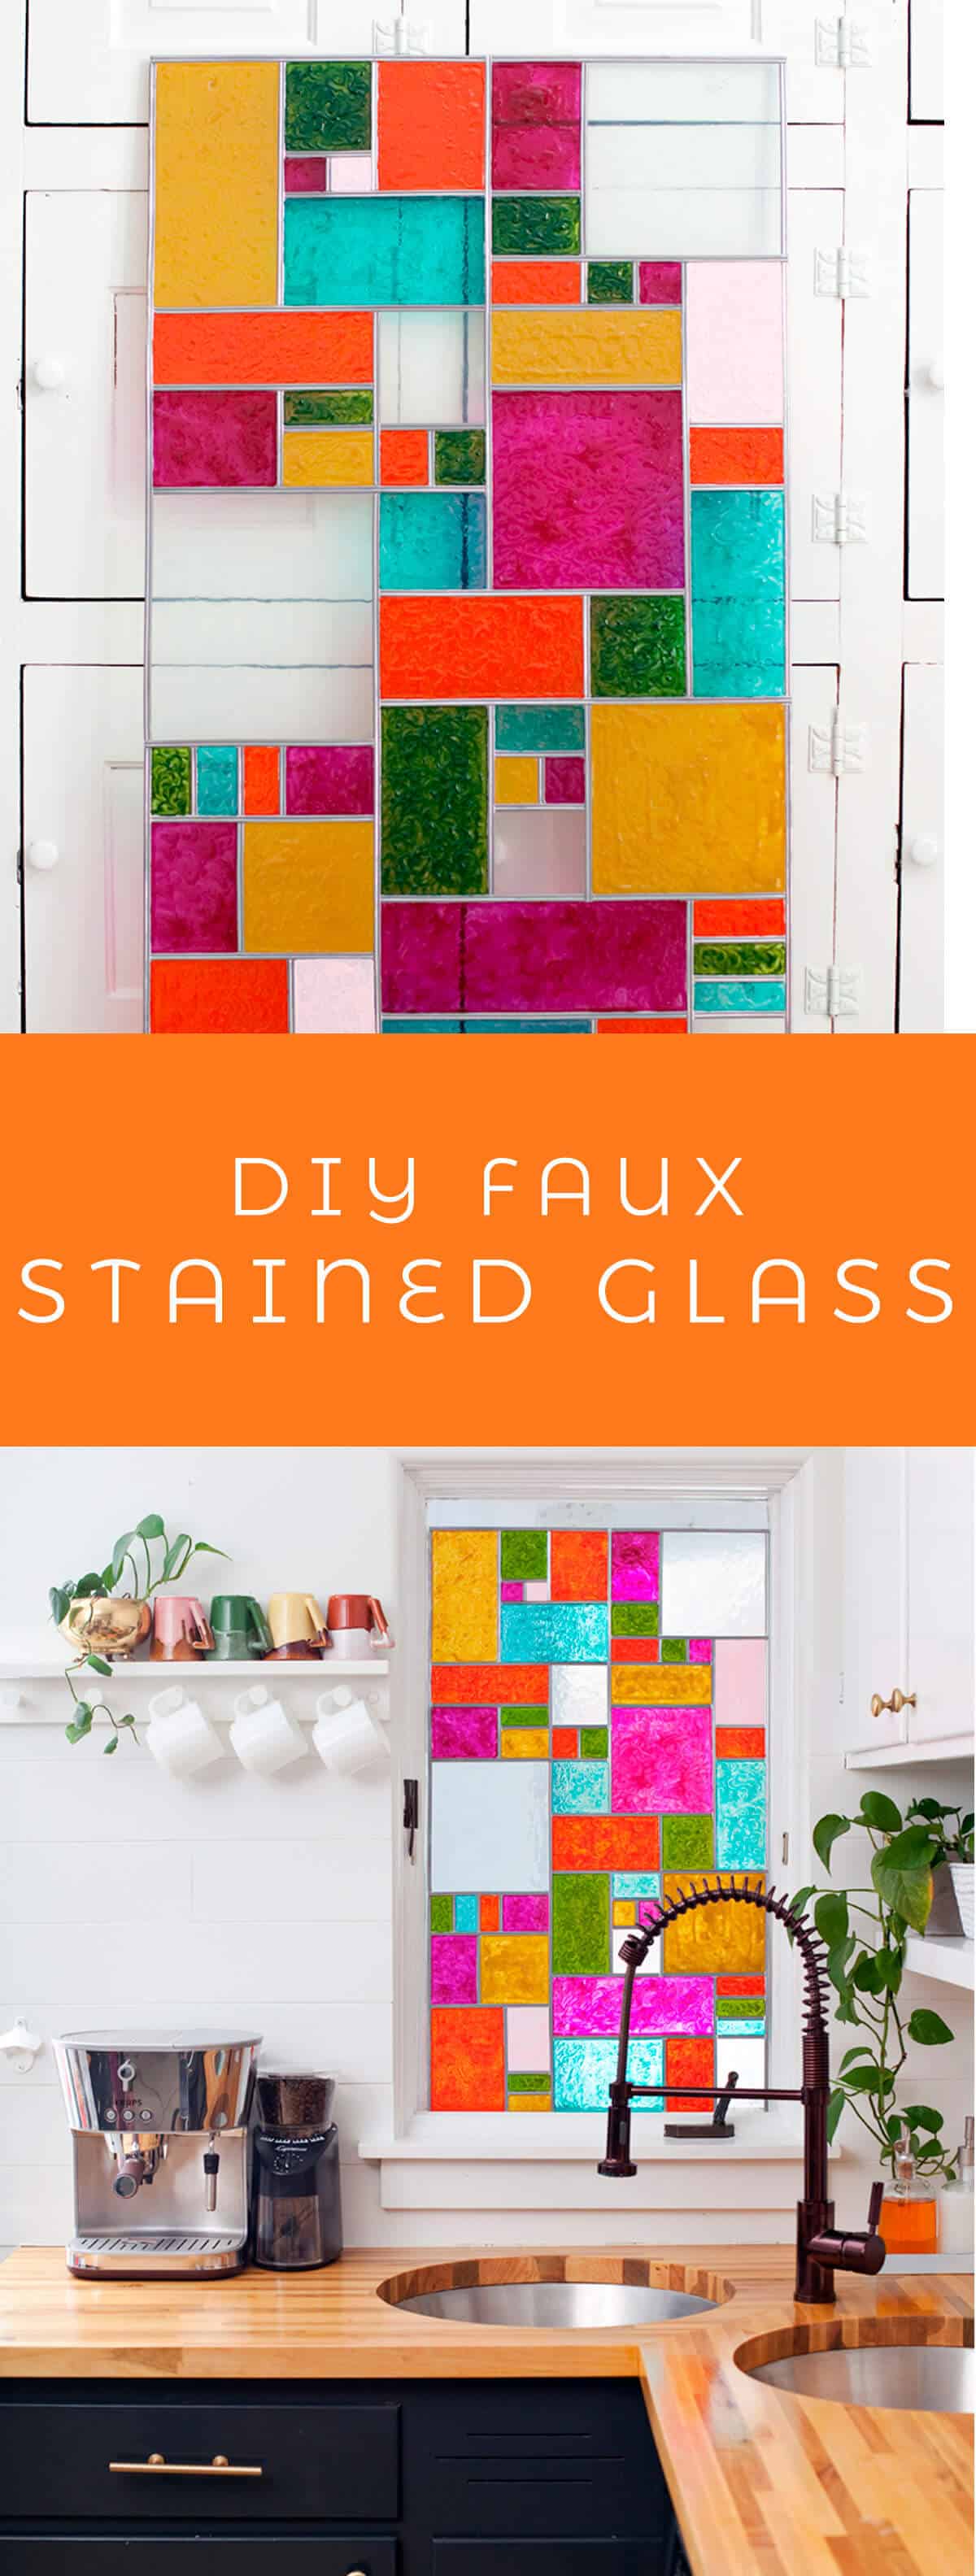
Stained glass isn't just for cathedral windows or Irish pub windows. It's also for plain ol' windows in normal folks' homes, like mine! I've discovered that lots of cities have places where you can actually learn how to make authentic stained glass, but I wanted to see if I could get a similar look using glass paint and metal strips.
I love the way my faux stained glass panel turned out, but I did learn a few techniques for achieving the best results. Check out my process below and learn how to make your own faux stained glass look even prettier than mine!
Supplies:
-glass panel (You can have a glass shop make one to fit your window or else remove glass from an unused picture frame if you don't need it to be a specific size.)
–lead adhesive strips (I used the entire package for this window.)
–glass paint (I preferred the consistency of the Gallery Glass brand to Martha Stewart.)
–craft paper
-marker
-sharp blade or scissors (I ended up preferring scissors)
–t-square or ruler
Step One: Lay out your backdrop paper and trace the outline of your glass panel. If you are using a t-square, make sure the glass panel is square with your table before tracing. Then design your stained glass pattern with marker lines.
Step Two: Lay the glass panel over the lines you made with the marker. Cover the lines with the lead strips that you cut to size with sharp scissors. I cut my pieces a bit longer than what I needed and then cut away tiny bits of the end until it fit perfectly. Use a stylus to press the metal strips into place. (The lead strips I used came with a stylus.)
Step Three: Outline the inside of each section of the design with glass paint. Be very careful to keep the line straight and go all the way up to the edge of the lead strips.
Step Four: Fill in the outlined area with a thick layer of paint, and use the tip of your bottle to spread the paint around. To prevent bubbles and to smooth out the texture, use glass brushes instead of the tip of your bottle. I didn't use glass brushes and had trouble with the texture of my paint showing in the final product. If you get bubbles, use a tooth pick or needle to pop them.
Step Five: Fill in all of the sections of your design with paint, working so that your arm will not accidentally get into freshly painted sections. You may wish to take your time and do random sections across the glass and wait for the paint to dry before doing another round of random sections. That's what I did, and it saved my sanity from having to paint so many sections in one sitting!
Advice for the best outcome:
Use the best glass paint. I liked the runnier consistency of the Gallery Glass paint to the thicker Martha Stewart paint, but if you do decide on Martha Stewart glass paint for the color selection, be sure to select the liquid fill paint, not the gloss or frost paint. It smooths out better.
Apply thick coats of paint. Don't try to skimp on your paint, as I did in a few of my sections. I was running out of paint and didn't want to take another trip to the store to buy another bottle. Thicker paint will settle nicely and give less of a textural design in the finish as the light shines through and highlights your brush strokes.
Finish off the joints of your metal strips. Something I didn't do with my panel is to dab pewter glass outliner onto the joints to give a more realistic finish to the leaded strips. This will also fill in any gaps where your lead strips may have been ever so slightly too short. This is an added expense, but will give an added air of authenticity to your faux glass panel.
I bought mirror hanging hardware to mount this panel in my kitchen window, but I didn't end up having a wide enough mounting surface in my window trim to use the hardware, but the window trim along my window sill did provide a nice ledge to lean the panel against my existing window. I'm still on the hunt for the perfect hardware to secure the panel in place, but for now it's sitting pretty right here behind my kitchen sink giving me some much needed privacy next to the front door of our house. There are lots of affordable stained glass panels made by artists (this one is so cool) and you can use this method to add stained glass effects easily as well…have fun! –Mandi
P.S. Check out more home decor on our wishlist and shopping pages!

DIY Faux Stained Glass
How to make a faux stained glass
- glass panel (You can have a glass shop make one to fit your window or else remove glass from an unused picture frame if you don't need it to be a specific size.)
- lead adhesive strips (I used the entire package for this window.)
- glass paint (I preferred the consistency of the Gallery Glass brand to Martha Stewart.)
- backdrop paper
- marker
- scissors
- t-square or ruler
-
Lay out your backdrop paper and trace the outline of your glass panel. If you are using a t-square, make sure the glass panel is square with your table before tracing. Then design your stained glass pattern with marker lines.
-
Lay the glass panel over the lines you made with the marker. Cover the lines with the lead strips that you cut to size with sharp scissors. I cut my pieces a bit longer than what I needed and then cut away tiny bits of the end until it fit perfectly. Use a stylus to press the metal strips into place. (The lead strips I used came with a stylus.)
-
Outline the inside of each section of the design with glass paint. Be very careful to keep the line straight and go all the way up to the edge of the lead strips.
-
Fill in the outlined area with a thick layer of paint, and use the tip of your bottle to spread the paint around. To prevent bubbles and to smooth out the texture, use glass brushes instead of the tip of your bottle. I didn't use glass brushes and had trouble with the texture of my paint showing in the final product. If you get bubbles, use a tooth pick or needle to pop them.
-
Fill in all of the sections of your design with paint, working so that your arm will not accidentally get into freshly painted sections. You may wish to take your time and do random sections across the glass and wait for the paint to dry before doing another round of random sections. That's what I did, and it saved my sanity from having to paint so many sections in one sitting!
Use the best glass paint. I liked the runnier consistency of the Gallery Glass paint to the thicker Martha Stewart paint, but if you do decide on Martha Stewart glass paint for the color selection, be sure to select the liquid fill paint, not the gloss or frost paint. It smooths out better.
Apply thick coats of paint. Don't try to skimp on your paint, as I did in a few of my sections. I was running out of paint and didn't want to take another trip to the store to buy another bottle. Thicker paint will settle nicely and give less of a textural design in the finish as the light shines through and highlights your brush strokes.
Finish off the joints of your metal strips. Something I didn't do with my panel is to dab pewter glass outliner onto the joints to give a more realistic finish to the leaded strips. This will also fill in any gaps where your lead strips may have been ever so slightly too short. This is an added expense, but will give an added air of authenticity to your faux glass panel.
Credits // Author and Photography: Mandi Johnson. Photos edited with Stella and Valentine from theSignature Collection.

How to Make a Window Look Like Stained Glass
Source: https://abeautifulmess.com/diy-faux-stained-glass/
0 Response to "How to Make a Window Look Like Stained Glass"
Post a Comment